Monday, November 28, 2011

Bathroom Inspiration Was Found In A Magazine Picture

The shower is now open and airy
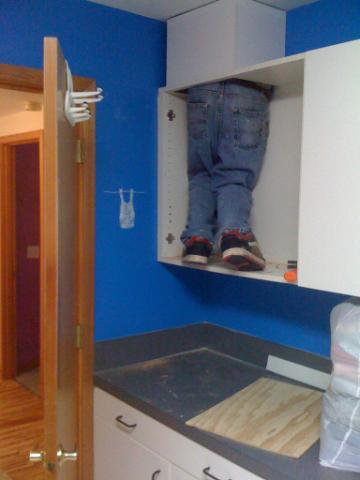
David and Kim wanted a spa like retreat master suite and luxury bathroom in their 1990’s Beaverton home. Their bathroom inspiration was found in a magazine picture and from that evolved a customized design plan by Revive LLC with the completion the work. Though this home’s master bathroom was already large in size, the hunter green 6”x6” tiles with white grout now dulled from the years, dominated and darkened the room along with the outdated brass fixtures.  The once cavernous shower was expanded to accommodate a sitting bench off the tub surround and is encased with 3/8” Euro glass panels and door to keep the space open and airy. The 22” soap niche inside the shower has a shelf to hold multiple items and a Grohe handheld unit completes the shower water experience.  Light in color  18”x18” Carrara honed marble tiles were meticulously selected by our tile crew and placed so the grain would all flow in the same direction from the floor to the shower walls and tub surround giving it a cohesive look. Matching bull nose pieces framed the edges and backsplash areas.  And a tub step was incorporated to help with easier access in and out of the large soaker tub. To accentuate the senses of warmth on chilly Oregon mornings, a Thermo Warm Wire radiant floor heating system with thermostat was installed and a wall towel warmer heats their towels for instant coziness exiting the shower. Additional can lighting with a dimmer switch controls the lighting for brightening on gray Oregon days or lowering for ambience settings.   
Pre-tile stage
Pre-Painting stage
 A custom vanity sits at a comfortable 36” height, topped with a matching Carrara marble slab and has roll out drawers in the cabinet door spaces for additional storage. The tub surround front and medicine cabinet door were custom made to match the vanity raised panel profile. All cabinetry, baseboard, and crown molding were spray painted in a soft white to keep the look smooth and clean to coincide with a custom mixed blue wall color.  For additional storage, a custom built on site mirrored shelving unit sits tucked in the private area above the toilet. The open shelves house additional bathing items and the mirrors reflect light in what could be a dark area.
In the master bedroom, which was decent in size, David and Kim wanted more room for a seating area and extra dresser. They wanted a true master suite. So an adjoining wall to an extra bedroom was knocked down and wall arches were built for architectural interest between the two spaces now blended cohesively together wrapped in crown molding and a new plush Fabrica Denali carpet. The new ceiling fan adds a pop of modern flair to the stylish bedroom. The custom wall color is just shades lighter than the bathroom for continuity between the rooms.
After wall removal, Master suite now extends into a
new seating area.
The wall between the two rooms was
removed to expand the master suite.
The door in the extra room was closed
up to have only one entry into large space. 
 
And no master suite is complete without a walk in closet, so the original master closet was expanded into the old extra bedroom’s closet then encased with cedar plank along with additional shelving plus a cubby hole storage. 
Now David and Kim have their sanctuary. A private retreat in a soft soothing palette, delightful pampering luxuries, and the blend of personal choices complete this space they desired… All inspired from a magazine picture. What’s your inspiration?

Thursday, October 20, 2011

Modifying What You Have Can Still Make An Impact

It’s often true that trends come full circle, just look at the current boom in mid Century furnishings, colors and décor. Take for example this original staircase railing, something that frankly resembles an outdoor deck railing only it’s indoors. We can comment because we too once had the same type of “outdoor” railing in our house. What once was popular in the 80’s is now deemed outdated and replaced with a modern twist in its use of iron adapted from the 60’s.


With careful disassembling of the railings, new bull nosed stair tread ends were replaced because the old balusters were notched into the existing ones. New cherry wood newel posts and railings were installed as well as the wall railings adhered by Oil Rubbed Bronze brackets. The balusters are single twisted iron Oil Rubbed Bronze with matching shoes that now sit on the stair treads. And we added a stair skirt to complete the look. Modifying this existing staircase simply gave it a new appeal.

Monday, October 17, 2011

From 20th Century To 21st Century: A Vintage Kitchen Gets A Transformation

There’s something to be said about the charm of a vintage kitchen with its original cabinets containing display shelves and border tiled counter tops.  But for these homeowners it was time for a change. They wanted a sleek new modern kitchen that gave them plenty of storage and entertainment space. The kitchen was gutted and replaced with new Cherry wood cabinets with shaker style doors and modern stainless steel pulls. To incorporate more work space and seating, an island was placed in the center of the kitchen including electrical outlets for appliance capability. And a pantry unit with roll out shelves behind that.


In the nook area, we custom built a banquette with angled seating for comfort, stained to match the cabinetry. The dining table is shaped for additional seating on the outer edge. To utilize an unusual space, the bay window now adorns additional storage cabinetry with a buffet top for additional serving space.  The kitchen counter tops are 3CM Chroma “Pearl White” Polished and the buffet and dining table top is Chroma “Serena” Polished, subtle color differences create distinction in the areas. Glass mosaics add color and reflective light to the backsplash placed from counter top to the base of the upper cabinetry. And a soft green wall color ties it all together.   A custom built transition piece with “rain drop” glass panels hangs in the ceiling to separate the two spaces.  Gone is the traditional florescent ceiling light fixture, now the kitchen has can lighting, modern pendants, and under cabinet lighting to enhance prep and dining areas. The floors were replaced with Bamboo Strand (“Green Product”) hardwoods that coordinated nicely with existing original hardwoods off the kitchen entries.

Remodeling a kitchen should contain some forethought to suit your needs and life style. With a personally designed kitchen plan by Revive, these homeowners were able to make their product selections, ordered, and on site ahead of construction which made the remodeling process go very smoothly.  The end result, a beautiful kitchen and very happy clients.    


Friday, October 14, 2011

When A Deal Can Cost You More

We see it all the time when we are called out to repair a structure that was done incorrectly by others and has now become a problem. Often these clients have hired a neighbor, or a friend of a friend who may have some skills, who are in need of work, and will do the work for a lower cost than the professionals. And now there’s a problem. That deal may not really be such a great bargain after all.


For example, this fence was installed by a neighbor last year, within one year this new fence had eight panels that were leaning and became unattached to the rails due to in properly installed post footings and railing brackets. Now it must be “un done” and reinstalled the proper way, costing the homeowner a lot more money than she had originally paid her neighbor. She has no recourse in going back to the neighbor to fix it as there was no contract, warranty, and he was not a licensed contractor with liability insurance , nor a bond. 

When it comes to your home and protecting your investment, it’s advised to have the work done by a licensed professional who can stand behind their work because they have the credentials, CEU’s (Continuing Education Classes) knowing the latest building codes/permits, licensing, bond, and insurance. It just may end up saving your money in the long run.   

Wednesday, October 12, 2011

Is Your Deck Safe?

The Pacific Northwest is hard on natural materials exposed to our damp weather. And each year hundreds of people are injured in this country as a result of deck failures. Deck failures are most often caused by faulty construction methods, unsuitable or improper materials, and lack of maintenance. Most experts agree that the average life expectancy of a wood deck is 10 to 15 years. Remember, decks are composed of natural materials exposed to weather, and, as a result, will not last forever. Constructing and using the proper structural connectors and fasteners by code will assure a safe, strong deck.

According to Simpson Strong Tie, to evaluate the safety of a deck, homeowners should look for warning signs that a deck is unsafe: loose connections (for example, a wobbly railing), missing connections (for example, the deck is just nailed to the side of the house), corrosion, rot and cracks. The two critical areas in a deck collapse are typically the deck's connection to the house and the railings.


This deck started out as a repair. Its railings and lattice that was used as balusters were rotted after many years and made it unsafe.  Upon further evaluation the whole structure was rotting and it had to be replaced. Revive Remodeling rebuilt the whole deck with code regulated connectors and fasteners. The new railings were carefully designed so the balusters were attached to both the outside and inside of the railing to avoid any possibility of anyone or thing to break through. The step and stairs are now code compliance in depth and height. And the homeowners now have a sturdy, safe deck to entertain on. Just like your home, it's important to make sure your deck is built right.


Tuesday, October 4, 2011

Water Is A Damaging Source For Your Home’s Exterior


Fall is here and that means Old Man Winter is just around the corner bringing harsh elements to the outside of your home. Maintaining your home’s exterior is one sure way of avoiding possible further damage to your home that could seep into the inside and cost you more money in the future.

This homeowner noticed some leakage inside near the upstairs window.  The first thought was maybe it was a faulty window, or that it was installed in properly. But after that was ruled out, we did further  exploring and discovered that the original siding was not installed correctly and there were areas where rain water was seeping in and running down into the window inside. This caused the siding to become completely wet and rotted after many years. If this had been ignored much longer the threat of mold certainly would have come into play. We removed the old siding, belly band, etc. and installed new sheathing, Tyvek moisture house wrap, siding, flashing, and heavy duty caulking. It’s pretty air tight now.  

Water is a damaging source for your home’s exterior. Before the big rains hit, it may be a good idea to take a good look at the outside of your home for potential hazards. Your home maintenance plan should include caulking up all the possible seams and places where old caulk may have shrunk or cracked after years of exposure. Get your gutters cleaned for free water flow, check your door thresholds for dry rot, and areas in your yard that may have bad elevation problems creating water flowing back towards your house.  Fix potential problems ahead of time and you can settle in for the Winter knowing your home is safely protected keeping you warm and dry.

Sunday, October 2, 2011

No Job Too Small

When we say “no job too small” we mean it…
Okay, we couldn’t resist saying it because of this great shot of our lead carpenter up inside a laundry shoot. Over the summer one of our clients wanted her laundry shoot modified and Chris was just the right size to get up inside and install the new shaft

Friday, February 11, 2011

Teresa's New Bathroom

 Meet Teresa, a beautiful 15 year old high school student. Teresa’s parents contracted Revive to remodel a bathroom to accommodate her special needs. You see, Teresa is confined to a wheelchair, but that doesn’t stop her remarkable willing spirit. Day one she was the first to throw a hammer into the sheetrock to begin demo. Throughout the remodel Teresa was involved in the process as we placed the vanity height, sink, and faucets to fit her needs, created a curb less shower with temperature controlled valves, and sloped the floor for easier access into the bathroom and the newly opened closet.

We can say that it was Teresa who inspired us to create a space in which she could be more independent. How fitting to our tag line “Remodeling That Revives The Value Of Your Life At Home“. It truly was our privilege in getting to know Teresa and her wonderful family.


Wednesday, February 9, 2011

Pricing Isn’t Everything

Everyone’s looking for a bargain right? And we’re no exception as we want to save money whenever we can also, just like our clients when looking at remodeling or repair costs. Recently we learned a valuable lesson, we should practice what we often preach, pricing isn’t everything when it comes to your home‘s upgrades.

At the end of 2009 we had to replace our gas furnace and heat pump. We did our due diligence and got a few bids. The costs were high, but there was one smaller company that was offering a greatly reduced price and of course we were excited to save a lot of money. We checked out the company with the CCB and everything appeared to on the up and up. In hindsight, there were some red flags we should have paid more attention to. First, the company’s owner asked for a portion of the down payment in cash (umm?), and when asked if he was pulling a permit he said he wasn’t, but we could get it ourselves. So we did, figuring he was trying to save us some money instead paying him to do it.

The equipment was installed and we were happy to have new “efficient” HVAC units and blowing heat into the house. But as soon as that 25 degree weather hit, we noticed the gas furnace was intermittently blowing cold air into the house. We had the installer come out several times to see what the problem was and he deducted it might be a manufacturer’s issue. He was suppose to have them contact us, but we never heard back. The weather warmed up and we didn’t seem to be having the issues of the cold air again. Life happened and we moved on.

With the below 30 degree weather we discovered, with frustration, it would take all day for the house to reach 70 degrees. Hence, we called a different heating company in to problem shoot. The technician said the furnace’s configuration had restricted air flow which caused the unit to overheat and then blow cold air. There was our “aha” moment. The initial installation was incorrect and now to correct it (cuz we like heat) we get to fork out a chunk of more money to fix what should have been done right in the first place. So much for saving money. And this correction is the best fix economically, our other option? To pull the whole unit out and start new… no thanks.

So, lessen learned. Lower pricing isn’t everything, it just may mean more costs in the future.
 

Tuesday, January 25, 2011

What Your House May Be Telling You

Nothing can be more frustrating than having to pay out extra money on a home repair that could have been avoided if things were installed properly to begin with. We run across these annoyances a lot when we are asked to evaluate a repair through our handyman services. Case in point, we were asked to replace a window that had moisture issues, when we pulled out the existing window we found dry rot and mold in the window sill, trimmer stud, sheathing and boards. We discovered that the original vapor barrier wrap was installed incorrectly thus creating moisture problems. We then had to pull out the other close by window too, repair the water damaged materials and reinstall and protect correctly.

Many problems go unnoticed simply because you can't see them until they've already done extensive damage. If you do notice something is wrong, don't dismiss it. A harmless watermark may not be that harmless after all. It could in fact be an indicator of a plumbing problem, exterior flashing, or a roof problem that will eventually lead to dry rot, mold, drywall damage, or a problem with structural integrity. It’s just a good reminder to get them checked out and find out for sure; it may save you from having to shell out some big bucks later on!

Saturday, January 8, 2011

Turning An Empty Space You Already Have Into Livable Space

Every homeowner finds that at one point or another they need more space. Where do you get more space? Why not look under? Converting a crawlspace is becoming more popular for people who can not afford to buy a new home, or do not want to move.

When you look into a crawlspace conversion you will see that it is a cost effective alternative to physically adding onto your home. If it’s large enough you could convert your crawl space into a room to use as an office or workshop! Doing this will save you money because you wouldn’t have to invest in new materials to put an addition on your home for this extra room. It will also increase your home’s value because you’re creating another useful room for the potential homeowner. It’s a great way to increase the value of your home while saving money that you could then use to improve other areas of your home.
 
Revive LLC converted this crawlspace into the homeowner’s private office space. He required some large niches to house his audio equipment and specialty wiring. Along with insulated soundproof walls, HVAC, bamboo flooring, canned lights, casement window and wood door with lite, the space was transformed into a livable private office space.