Sunday, April 15, 2012

Is The Notice To Lien Document I Received Mean My House Has Lien On It?

Your contractor is required by law to provide the Information Notice About Construction Liens when presenting the initial bid for projects estimated for over $2000. Typically upon ordering materials some vendors will send out a Notice of a Right to Lien document. This notice does not mean your home has a lien on it. It’s only a notice that if they are not paid they can apply a lien on your home. Unless your contractor is a crook and does not pay the owed amount, it’s merely a precaution by vendors who have a substantial amount of money invested.

In Oregon, construction liens generally need to be recorded within 75 days from the date the project was substantially completed, or 75 days from the date that the lien claimant stopped providing labor, material, equipment, or services, whichever happened first. If these potential lien holders have not been paid 75 days after a job has been completed than your contractor is not operating his business ethically. To enforce a lien, the lien holder must file a lawsuit in a proper court within 120 days of the date the lien was filed.

Contractors who have accounts set up with vendors will have specific terms and dates each month that require balances to be paid. If you’re concerned about your contractor’s track record call the vendor who has sent you a notice and ask them if your contractor has been delinquent.  Chances are if your contractor submitted the Notice To Lien Document with his bid he’s a legitimate and responsible contractor, only in rare cases do these liens actually happen.

Thursday, April 12, 2012

Apples To Apples vs Apples To Acorns


When comparing bids, it isn't the cheapest or the 'nicest' person you should select. You should understand why there are wide price differences. It could be there is a gap in your design that is interpreted differently by each contractor or what you have asked for, which means there may be arguments later.  If most of the bids are in line, and one is way high or way low, you’ll want to know why before dismissing or selecting them. For example, if you’ve asked for hardwood flooring the applications vary with selected hardwoods (nail in, click together, or glue) and the cost for install will differ. Are all bids for the same application? How about your cabinets? Are they custom built, off the shelf from the big box store, standard factory ordered? Are the boxes made of solid wood, melamine, particle board? Do they come with standard drawer glides or soft close? Believe it or not there are even grades of soft close guides to choose from.

A highly detailed scope of work is important because this is how you know what you are truly buying. What products are being used? HOW are those products being installed? Protect yourself and do your due diligence before eliminating bids only by pricing. On a major remodel, there are typically a few rounds of revisions before a final decision is made. With thousands of dollars at risk, why would you not examine all the details in comparison? There are a lot of contractors who have very basic proposals for a couple reasons: either they want some ambiguity so they have reasonable doubt should something go wrong, or it can be a tactic with low pricing to get their foot in the door knowing they can upcharge additional costs later.

A price-only decision almost always costs more in the long run.

A contract is just a statement of understanding and agreement. It can be changed as needed right up until you sign it. Ask lots of questions, if the answer isn't in the contract, add it. If you do not understand any part of the contract either have it reworded so you do understand it or have it removed; do not sign anything you do not fully understand and feel comfortable with.

Any contractor for improvement should contain a few key points including a highly detailed scope of work, pricing, schedule of payments, and unknown possible fees/contingencies. It's important to have everything out in the open as a protection to both the consumer and the contractor. Upfront communication is key to a well run jobsite and to meet your expectations.

Remember when you’re reviewing multiple bids are you really comparing apples to apples or apples to acorns? The difference can mean a great remodeling experience or a frustrating one.

Wednesday, January 4, 2012

The potential of utilizing spaces you may have within your home may be a hidden asset.


What once was an unfinished 7 x 10 foot storage room became the third bathroom in this Beaverton home. With a den and extra guest room on the basement level, guests would have to travel up one level to the end of the hallway to access a bathroom facility. Converting the room gave more livable square footage and convenience needs to the basement level.  An enclosed shower wall of 12” x 12” Daltile Monticito in Crema color set in a subway pattern extends onto the floor to give the small space continuity, and the shower floor is set in matching 2” x 2” mosaic tiles. Using a Euro clear glass shower door and panel allows the space to appear larger along with a size appropriate Regal Chicago pedestal sink and louver vanity mirror. This once hidden space nows serves a purpose with style and comfort.

Monday, November 28, 2011

Bathroom Inspiration Was Found In A Magazine Picture

The shower is now open and airy
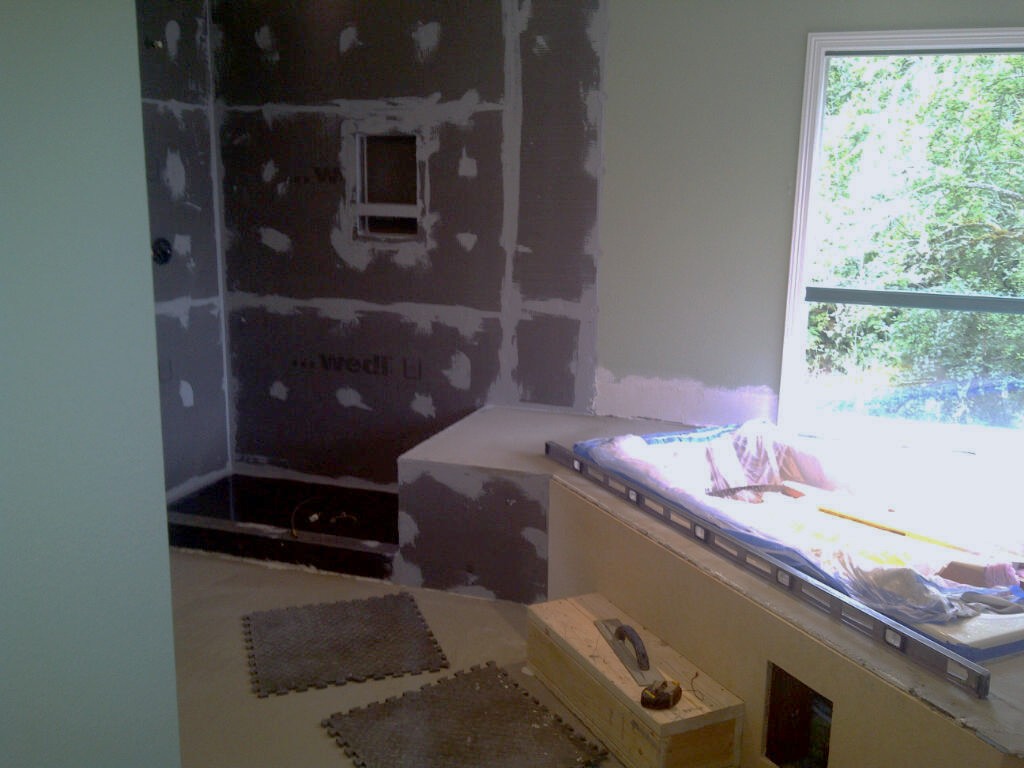
David and Kim wanted a spa like retreat master suite and luxury bathroom in their 1990’s Beaverton home. Their bathroom inspiration was found in a magazine picture and from that evolved a customized design plan by Revive LLC with the completion the work. Though this home’s master bathroom was already large in size, the hunter green 6”x6” tiles with white grout now dulled from the years, dominated and darkened the room along with the outdated brass fixtures.  The once cavernous shower was expanded to accommodate a sitting bench off the tub surround and is encased with 3/8” Euro glass panels and door to keep the space open and airy. The 22” soap niche inside the shower has a shelf to hold multiple items and a Grohe handheld unit completes the shower water experience.  Light in color  18”x18” Carrara honed marble tiles were meticulously selected by our tile crew and placed so the grain would all flow in the same direction from the floor to the shower walls and tub surround giving it a cohesive look. Matching bull nose pieces framed the edges and backsplash areas.  And a tub step was incorporated to help with easier access in and out of the large soaker tub. To accentuate the senses of warmth on chilly Oregon mornings, a Thermo Warm Wire radiant floor heating system with thermostat was installed and a wall towel warmer heats their towels for instant coziness exiting the shower. Additional can lighting with a dimmer switch controls the lighting for brightening on gray Oregon days or lowering for ambience settings.   
Pre-tile stage
Pre-Painting stage
 A custom vanity sits at a comfortable 36” height, topped with a matching Carrara marble slab and has roll out drawers in the cabinet door spaces for additional storage. The tub surround front and medicine cabinet door were custom made to match the vanity raised panel profile. All cabinetry, baseboard, and crown molding were spray painted in a soft white to keep the look smooth and clean to coincide with a custom mixed blue wall color.  For additional storage, a custom built on site mirrored shelving unit sits tucked in the private area above the toilet. The open shelves house additional bathing items and the mirrors reflect light in what could be a dark area.
In the master bedroom, which was decent in size, David and Kim wanted more room for a seating area and extra dresser. They wanted a true master suite. So an adjoining wall to an extra bedroom was knocked down and wall arches were built for architectural interest between the two spaces now blended cohesively together wrapped in crown molding and a new plush Fabrica Denali carpet. The new ceiling fan adds a pop of modern flair to the stylish bedroom. The custom wall color is just shades lighter than the bathroom for continuity between the rooms.
After wall removal, Master suite now extends into a
new seating area.
The wall between the two rooms was
removed to expand the master suite.
The door in the extra room was closed
up to have only one entry into large space. 
 
And no master suite is complete without a walk in closet, so the original master closet was expanded into the old extra bedroom’s closet then encased with cedar plank along with additional shelving plus a cubby hole storage. 
Now David and Kim have their sanctuary. A private retreat in a soft soothing palette, delightful pampering luxuries, and the blend of personal choices complete this space they desired… All inspired from a magazine picture. What’s your inspiration?